

Monday, 10 January 2022

Child Engagement in Museums: School Holiday Trails

The second instalment in a series of guest blog posts by Shiona Herbert of Ignite Your Audience
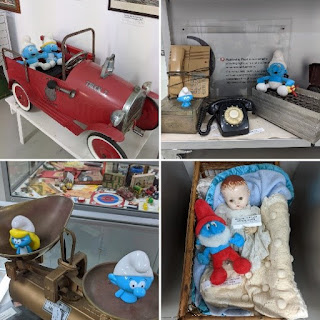
School holidays are scheduled four times a year in Australia – that's four prime opportunities to encourage families to visit your museum, so energise your collection with a simple theme that connects easily to children… TOYS! 

Let's take
Smurfs for example. These are great because they connect to those who loved Smurfs growing up in the 70s and 80s, and they connect to modern children who've witnessed a ‘Smurf revival’ with The Smurfs movie.

Collect a bunch of Smurf figurines, plush toys, books and games and place them in and around your museum - such as inside display cabinets, beside artefacts, and even create a little 'reading corner' of comfy cushions and Smurf books. Such items can be easily acquired from Gumtree, Facebook Marketplace, op-shops, or borrowed from local families.

It won't take much time to set them up in the museum, so the energy you have left over can go into making an advert for your local paper advertising the 'Arrival of the Smurfs'. While you're at it, send your advert to your local schools so they can place it in their newsletter or promote it on their Skoolbag app. Leave the toy trail up for a month, then pack it away and bring it out again in a year or two.

Take it one step further and invite a school or community group to come and actually place the Smurfs amongst your collection. This provides a great opportunity to build more 'ambassadors' for your museum. When people are involved with a space, they take pride in it and are more likely to promote it to others. 
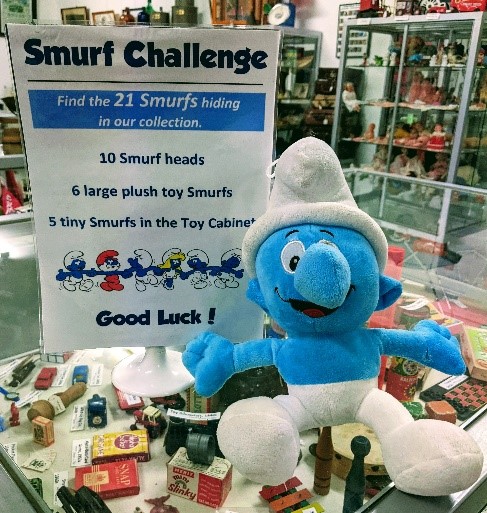

You may not expect to see a collection of 'monsters' displayed at a museum, but that's exactly what we did to connect to a Monster Stall market event the local Agricultural Society hosted across the road from the museum.

Prior to the event we gathered a heap of plush monster toys and monster trucks, then placed them amongst our artefacts on the day of the stall. We placed a flyer about the Monster Trail on the community noticeboard at the local supermarket encouraging people to come and 'find the museum monsters' after attending the Monster Stall.


This worked a treat as we had over 40 people of all ages come and look for the Monsters (which is a great turn-out for a small country town museum on a day of pouring rain). Those who popped in searched for the 'museum monsters' and received a monster sticker for their efforts.

This example illustrates that its not just school holidays that such an idea can be implemented; employ it to maximise visitor numbers when more people will be visiting your town for an event. By the way, the kids don’t actually touch or collect up the monsters - they just spot them, squeal with delight at finding one, and then it's off to search for the next one!
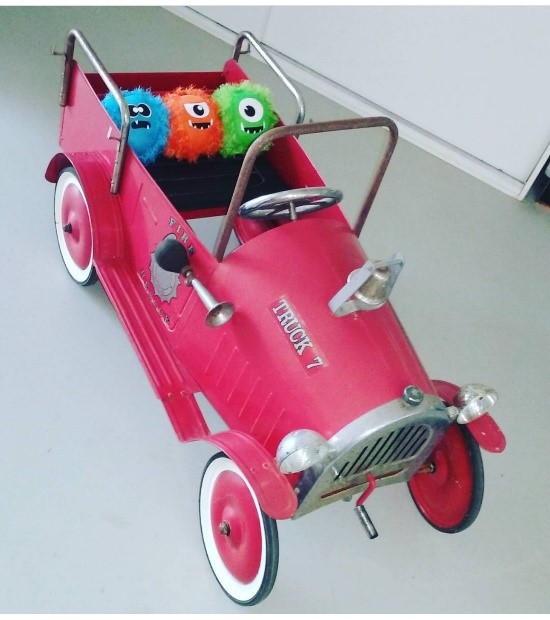

The practice of creating a toy trail occurs at larger museums too. The Western Australian Shipwrecks Museum in Fremantle offers their renowned Riddled with Rats holiday program every couple of years. They simply place 12 large rubber rats around the collection for visitors to find. They repeat it because it's so popular!

Why do they use rats? Because the Shipwrecks collection is predominantly from 17th century shipwrecks along the West Australian coast. There would have been plenty of rats onboard the ships that wrecked here as well as on those that successfully bypassed us on their way to Batavia (modern day Jakarta) as part of the spice trade. 

In terms of the cost of the trail, rubber rats are relatively cheap to buy and are easily stored. The Riddled with Rats trail also offer colourful A4 double sided trail guides to direct the experience and provide rat themed colouring sheets. 

You can value add by offering DIY colour-in sheets too, but otherwise, just place the Smurfs, Minions, Hello Kitty, ceramic cows… whatever it is you choose, amongst your collection and invite people to come and find these cheeky temporary museum residents.

If you find these ideas appealing for getting more people through the door then download the PDF for a brief guide of things to keep in mind when creating your Museum Toy Trail.

This is the second instalment in a series of guest blog posts by Shiona Herbert of Ignite Your Audience.

Tuesday, 10 August 2021

Child Engagement in Museums: DIY Colour-in Pages

The first instalment in a series of guest blog posts by Shiona Herbert of Ignite Your Audience

A small table with pencils, textas and colour-in pages will always attract the eye of young visitors in a museum. It's an area that they'll naturally gravitate toward for a number of reasons. Sometimes it's the only thing that is allowed to be touched in a museum space (and boy, do kids want to touch things in museums); it might be the only furniture in the museum suited to their height; or it might be a space that family members encourage them toward as Mum's and Dad's are grateful for the bit of bonus time they can have to themselves to stroll through the collection! It's much more pleasant seeing kids absorbed in a creative endeavor than watching them like a hawk so that they don’t disrupt precious artefacts.

You could choose any old colour-in but something unrelated to your museum lacks authenticity and the opportunity to make a connection to the items in your collection. If you have lots of tractors and vintage farming equipment, provide colour-ins related to this. If you have an impressive collection of sports memorabilia, find sport related colouring sheets. Or maybe you’ve got some wonderful dolls and toys on display – provide colour-in sheets related to this theme.

There are plenty of free colour-in sheets available on Google, just conduct a search of your chosen theme and collect half a dozen suitable images, print them out, and photocopy a bunch of them. If you’ve got a little more time on your hands, consider making your own colour-in designs using images from your photo collection.


How Do I Do That? 
  1. Find photos in your collection that you think will connect to a child audience.
  2. Scan them to create a digitised version of the photo.
  3. Open the image in Photoshop, another photo-editing program or even Word!
  4. Apply a treatment to the image to make it black and white and adjust the brightness and contrast to make the image more simplistic.
  5. Place your museum logo somewhere on the page in a spot that doesn't detract from the image.
  6. Print it out, have a go at colouring it in yourself and check if it feels right for colouring.
  7. Print or photocopy a small pile of them with textas, crayons or pencils, ready for the young visitors to your museum.
If you don't have photo-editing software, you can download a guide on how to do this in Word here.

More Ideas
  • Take it to another level and have a cleared wall or large pin-up board to display completed colour-in sheets. Remember to ask your artists to sign their work! It may just prompt a visit from other family members to see their children's colour-in art displayed in the museum!
  • Have a whole set of different museum colour-in’s stapled together and ready to give out to those who show lots of interest in the colour-in pages. Everyone loves a freebie to take home and while they work on the colouring sheets, it will prompt them to think about the museum again. Who knows, it might even provoke them to ask Mum or Dad to take them for another visit.
  • Many little country towns have colour-in pages included in the community newsletter or local paper. Including a museum-colour-in page is a double win: kids get to colour something of local relevance and your museum receives a valuable marketing opportunity.
If you really enjoy creating these personalised museum colour-ins, consider other platforms and places where they may be welcome. For example, there are often kids attending sports practice and you could create a series of Sport Legends colour-in pages of former local team photos. Or you might have some absolute cracker photos from agricultural shows of the past. Use these for a Let’s Put on a Show collection of colour-ins and make them available at the next town show.


The colour-in sheets shown on this page are from our Milk, Cream + Butter education resource.

This is the first instalment in a series of guest blog posts by Shiona Herbert of Ignite Your Audience.